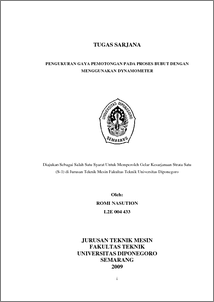
NASUTION, Romi and SATRIJO, Djoeli and RUSNALDY, Rusnaldy (2009) PENGUKURAN GAYA PEMOTONGAN PADA PROSES BUBUT DENGAN MENGGUNAKAN DYNAMOMETER. Perpustakaan Jurusan Teknik Mesin FT-UNDIP, Semarang. (Unpublished)
| PDF 92Kb |
Official URL: http://www.mesin.undip.ac.id/perpustakaan
Abstract
Metal cutting process is defined as a process which used to change shape of a metal made product by cutting. One kind of the cutting method which usually used is lathe process, where the process is maintained toward work substance of cylindrical shape. This observation is aimed to determine the effect or response graphic of independent variable which determined (spindle rotation speed, feed motion, cutting depth and material hardness level) toward dependent variable (cutting force and surface coarseness) of dynamometer designed and built by Machine Technique of UNDIP. The Dynamometer is a set of measurement tool which used to estimate of cutting force by principle to change its tension to be cutting force. The Dynamometer which working is using principle of electric. Commonly, the resistance change which used to measure the tension of motion measurement (LVDT pick-ups, moving plate capacitance pick-ups). To gain the response graphic of independent variable toward dependent variable in this observation is using two testing method, both testing with simple method and testing with Taguchi method. The estimation of simple testing method resulted response graphic of independent variable toward dependent variable, that is cutting force which the greatest value gained at level : spindle rotation by level 1 (200 rpm) , cutting depth by level 3 (1.5 mm), feed motion by level 3 (0.009 mm/rev) and the specimen of level 3 (metal iron DIN 34CrNiMo6). By measuring with Taguchi method, the greatest value of cutting force yielded at level: spindle rotation by level 1 (200 rpm), cutting depth by level 3 (metal iron DIN 34CrNiMo6). Whereas the best value on surface coarseness is yielded at level: spindle rotation by level 1 (200 rpm), cutting depth with level 1 (0.5 mm), feed motion with level 1 (0.045 mm / rev) and specimen of level 3 (metal iron DIN 34CrNiMo6). From this observation can be concluded that the dynamometer which made and designed shows the cutting force will be greater if spindle rotation value is smaller, the value of cutting depth more bigger, feed rotation value more bigger and material coarseness level more higher. Meanwhile for the best value on surface coarseness is yielded if the spindle rotation is on low rotation, low feed motion, small cutting depth and iron specimen is DIN 34CrNiMo6. Keywords: Dynamometer, Cutting Force, Cutting speed, Feed Motion, Cutting Depth, Surface Roughness
| Item Type: | Other |
|---|---|
| Subjects: | T Technology > TJ Mechanical engineering and machinery |
| Divisions: | Faculty of Engineering > Department of Mechanical Engineering Faculty of Engineering > Department of Mechanical Engineering |
| ID Code: | 3173 |
| Deposited By: | INVALID USER |
| Deposited On: | 08 Jan 2010 09:21 |
| Last Modified: | 08 Jan 2010 09:21 |
Repository Staff Only: item control page


